Batch Processing
Process multiple image folders automatically with consistent parameters.
Overview
Batch processing allows you to analyze many image sets using the same thresholds and settings, generating individual results for each folder plus a combined summary file.
Batch processing controls
Use Cases:
High-throughput screening experiments
Processing entire experimental datasets
Applying optimized parameters across all samples
Generating combined results for statistical analysis
When to Use Batch Processing
Best For:
✅ Multiple image folders to process ✅ Consistent imaging conditions across samples ✅ Known optimal threshold values ✅ Need for combined summary results
Not Ideal For:
❌ First-time analysis (optimize parameters first) ❌ Highly variable image quality ❌ Images requiring individual parameter tuning ❌ Samples needing extensive manual correction
Tip
Recommended Workflow:
Analyze 2-3 images manually
Optimize threshold parameters
Document optimal settings
Use batch processing for remaining images
Setup for Batch Processing
Before starting batch processing:
1. Organize Your Images
``` root_folder/ ├── sample_001/ │ ├── sample_001_w435.tif (DAPI) │ ├── sample_001_w525.tif (DNA-FISH) │ └── sample_001_w679.tif (CENP-C) ├── sample_002/ │ ├── sample_002_w435.tif │ ├── sample_002_w525.tif │ └── sample_002_w679.tif └── sample_003/
├── sample_003_w435.tif ├── sample_003_w525.tif └── sample_003_w679.tif
Important
Each sample should be in its own folder with all three channel images.
2. Configure Channel Identifiers
Set up identifiers that work for ALL your images:
DAPI identifier (e.g.,
435ordapi)Channel 1 identifier (e.g.,
525ordna_fish)Channel 2 identifier (e.g.,
679orcenpc)
3. Determine Optimal Thresholds
Test on representative samples:
Process 2-3 images manually
Try different threshold values
Choose values that work consistently
Document these optimal values
Running Batch Processing
Step 1: Load Image Folders
Click Load Images (or Batch Load)
Select the root folder containing all sample subfolders
All subfolders with matching images appear in the list
Note
The folder list (left panel) shows all image sets found. You can click individual items to preview them before batch processing.
Step 2: Configure Settings
Threshold Sliders:
Set both threshold sliders to your optimal values:
DNA-FISH Threshold: Set to your optimized value
CENP-C Threshold: Set to your optimized value
Processing Mode:
Choose one of two modes:
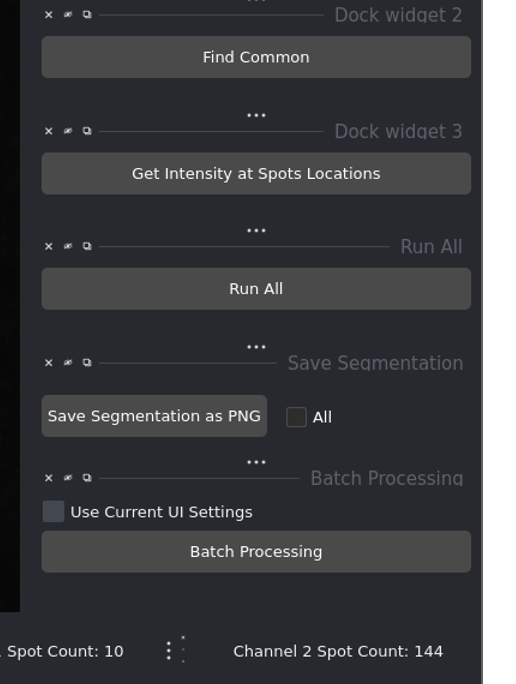
Mode 1: Use Current UI Settings (Checked)
Recalculates everything from scratch
Uses current threshold values for all images
Ignores any previous results
Use when: Parameters have changed or first batch run
Mode 2: Use Saved Results (Unchecked)
Uses previously saved results if available
Only processes new or modified images
Faster for repeat analyses
Use when: Re-generating summary from existing results
Skip Segmentation:
Check if you don’t need chromosome segmentation
Applies to all images in the batch
Step 3: Start Batch Processing
Click Batch Processing button.
What Happens:
Progress updates in console/terminal
Each folder is processed sequentially
Individual CSV files saved in each folder
Summary file created in root folder
Completion message when done
Processing Time:
Depends on:
Number of images
Image size
GPU availability
Whether segmentation is used
Typical: 1-2 minutes per image set with GPU
Monitoring Progress
Console Output:
Watch the terminal for progress messages:
``` Processing folder 1/20: sample_001
Segmenting…
Detecting Channel 1 spots…
Detecting Channel 2 spots…
Finding common regions…
Calculating intensities…
Saved: sample_001_intensity.csv
- Processing folder 2/20: sample_002
…
Status Indicators:
Current folder being processed
Step being executed
File save confirmations
Error messages (if any)
Tip
Don’t close the application window during batch processing!
Output Files
Individual Results
For Each Folder:
sample_001/sample_001_intensity.csv
Contains:
Spot coordinates
Intensity measurements
Spot counts
Folder-specific metadata
Format:
`
spot_id,x_coord,y_coord,channel1_intensity,channel2_intensity,folder_name
1,145.3,287.9,1250,890,sample_001
2,203.7,156.2,1450,920,sample_001
...
`
Combined Summary
Location:
root_folder/combined_results_summary.csv
Contains:
All spots from all folders
Combined dataset for statistical analysis
Folder identifiers for grouping
Consistent column structure
Use Cases:
Statistical analysis in R/Python
Plotting in Excel/GraphPad
Machine learning datasets
Meta-analysis across experiments
Intermediate Files
Optionally saved (depending on settings):
`
sample_001/
├── sample_001_intensity.csv          (main results)
├── sample_001_segmentation.npy       (segmentation mask)
├── sample_001_channel1_spots.npy     (spot labels)
└── sample_001_channel2_spots.npy     (spot labels)
`
These allow reloading and reviewing results later.
Handling Errors During Batch Processing
If Processing Fails:
The batch processor attempts to continue with remaining folders even if one fails.
Common Errors:
Error: “No images found in folder”
Cause: Channel identifiers don’t match filenames
Solution: Check identifier configuration
Error: “Segmentation failed”
Cause: Poor DAPI image quality
Solution: Enable “Skip Segmentation” or process manually
Error: “CUDA out of memory”
Cause: GPU memory exhausted
Solution: Process smaller batches or use CPU mode
Partial Results:
If batch processing stops, already-processed folders have saved results
Restart from the failed folder
Use “Use Saved Results” mode to avoid re-processing
Post-Processing Batch Results
After batch processing completes:
1. Verify Completion
Check that all folders have output CSV files:
`bash
# Count CSV files
ls -1 *//*_intensity.csv | wc -l
`
2. Review Summary File
Open combined_results_summary.csv:
Check for expected number of rows
Verify all folder names are present
Look for anomalous values
3. Quality Control
Spot-check a few samples:
Reload in the viewer
Verify segmentation and spot detection
Make manual corrections if needed
Re-run individual samples if necessary
4. Statistical Analysis
Use the combined summary for:
Plotting distributions
Comparing experimental groups
Statistical testing
Publication figures
Optimizing Batch Performance
Speed Improvements:
Use GPU Acceleration:
Significantly faster Cellpose segmentation
Requires CUDA-compatible GPU
Install PyTorch with CUDA support
Skip Segmentation When Possible:
Saves 5-10 seconds per image
Use if chromosome boundaries not needed
Process in Smaller Batches:
20-50 images per batch
Reduces memory usage
Easier to monitor progress
Close Other Applications:
Free up GPU memory
Allocate more RAM to the application
Parameter Consistency:
Document Your Settings:
Create a parameter file for each experiment:
`
Experiment: 2025-10-24_CentromereStudy
DAPI Identifier: 435
Channel 1 Identifier: 525
Channel 2 Identifier: 679
DNA-FISH Threshold: 45
CENP-C Threshold: 55
Skip Segmentation: No
Date Processed: 2025-10-24
`
Verify Consistency:
Use same imaging parameters across samples
Maintain consistent sample preparation
Apply same analysis thresholds
Document any variations
Best Practices
Before Batch Processing:
✅ Test on representative samples
✅ Optimize and document thresholds
✅ Verify file naming consistency
✅ Check disk space for outputs
✅ Backup original images
During Batch Processing:
✅ Monitor console for errors
✅ Don’t close the application
✅ Avoid running other intensive tasks
✅ Keep computer powered on
After Batch Processing:
✅ Verify all folders processed
✅ Check combined summary file
✅ Perform quality control checks
✅ Backup results files
✅ Document processing parameters
Troubleshooting
Problem: Inconsistent Results Across Images
Likely Cause: Variable image quality
Solution: Process problematic images individually with adjusted parameters
Problem: Batch Processing is Slow
Solutions:
Enable GPU acceleration
Skip segmentation if not needed
Process smaller batches
Close other applications
Problem: Out of Memory Errors
Solutions:
Reduce batch size
Close other applications
Use CPU mode instead of GPU
Resize images if very large
Problem: Some Folders Skipped
Causes:
Missing channel images
Incorrect filename patterns
File permission issues
Solution: Check folder structure and filenames
Next Steps
Basic Workflow - Review single image analysis
Manual Corrections - Fix issues in batch results
Troubleshooting - Detailed error solutions
Advanced Features - Advanced batch options